SwiftUI's Multiline Text Alignment Guide
This article provides insights into mastering text alignment in SwiftUI, offering alignment customization tips for multi-line text
When using Text views in SwiftUI that consist of multiple words or sentences, by default, the Text view will be displayed with left-aligned text that wraps across several lines. If you want to change this alignment, you can use a specific modifier called multilineTextAlignment.
func multilineTextAlignment(_ alignment: TextAlignment) -> some ViewWhere the values for TextAlignment can be center, leading, or trailing. Here's an example of how to adjust text alignment in a Text view with multiple lines:
import SwiftUI

struct ContentView: View {
    var body: some View {
        Text("Lorem ipsum dolor sit amet, consectetur adipiscing elit. Nullam vitae elementum lorem, id pharetra metus.")
            .multilineTextAlignment(.center)
            .padding()
    }
}

If you want to limit the maximum number of lines that can be displayed, then you can add the lineLimit modifier as well.
func lineLimit(_ number: Int?) -> some View
import SwiftUI

struct ContentView: View {
    var body: some View {
        Text("Lorem ipsum dolor sit amet, consectetur adipiscing elit. Nullam vitae elementum lorem, id pharetra metus.")
            .multilineTextAlignment(.center)
            .lineLimit(2)
            .padding()
    }
}

By adding the lineLimit, if the number of lines exceeds the limit, the text will automatically be displayed with an ellipsis (...).
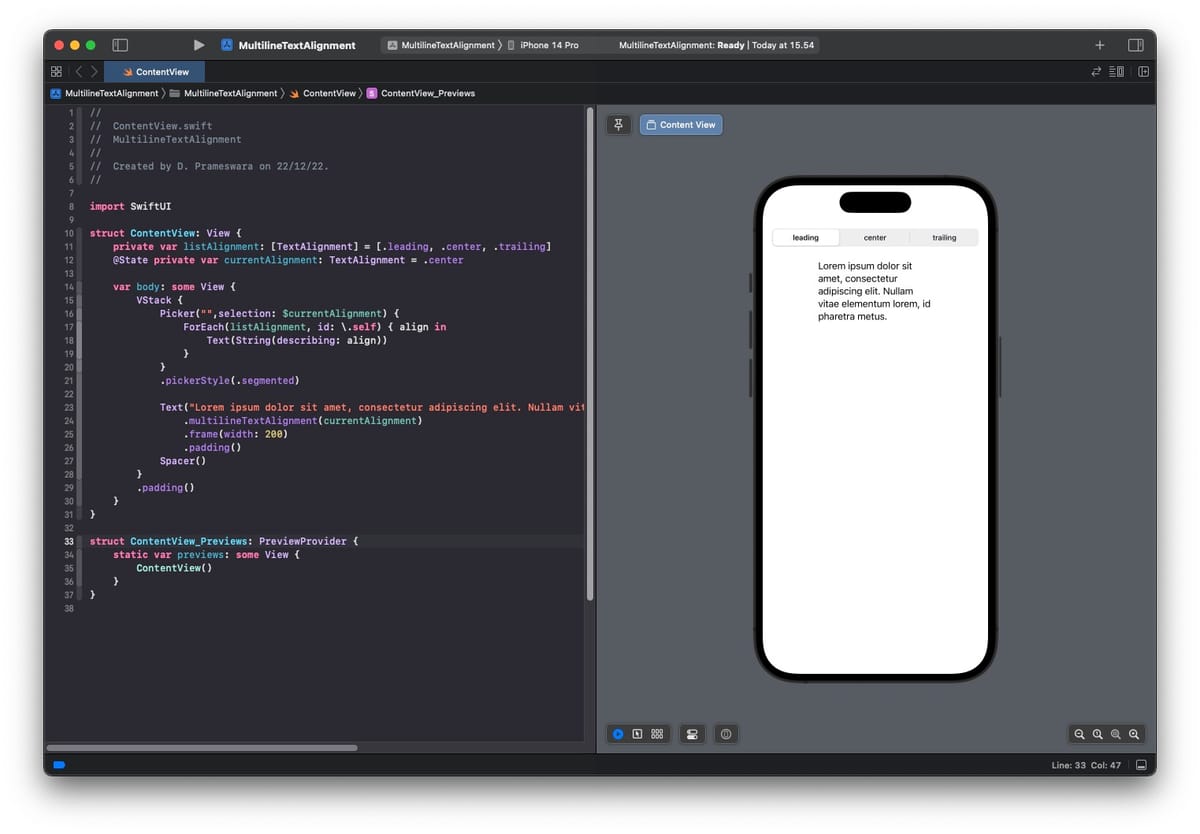
Here is an example of implementing the multilineTextAlignment modifier:
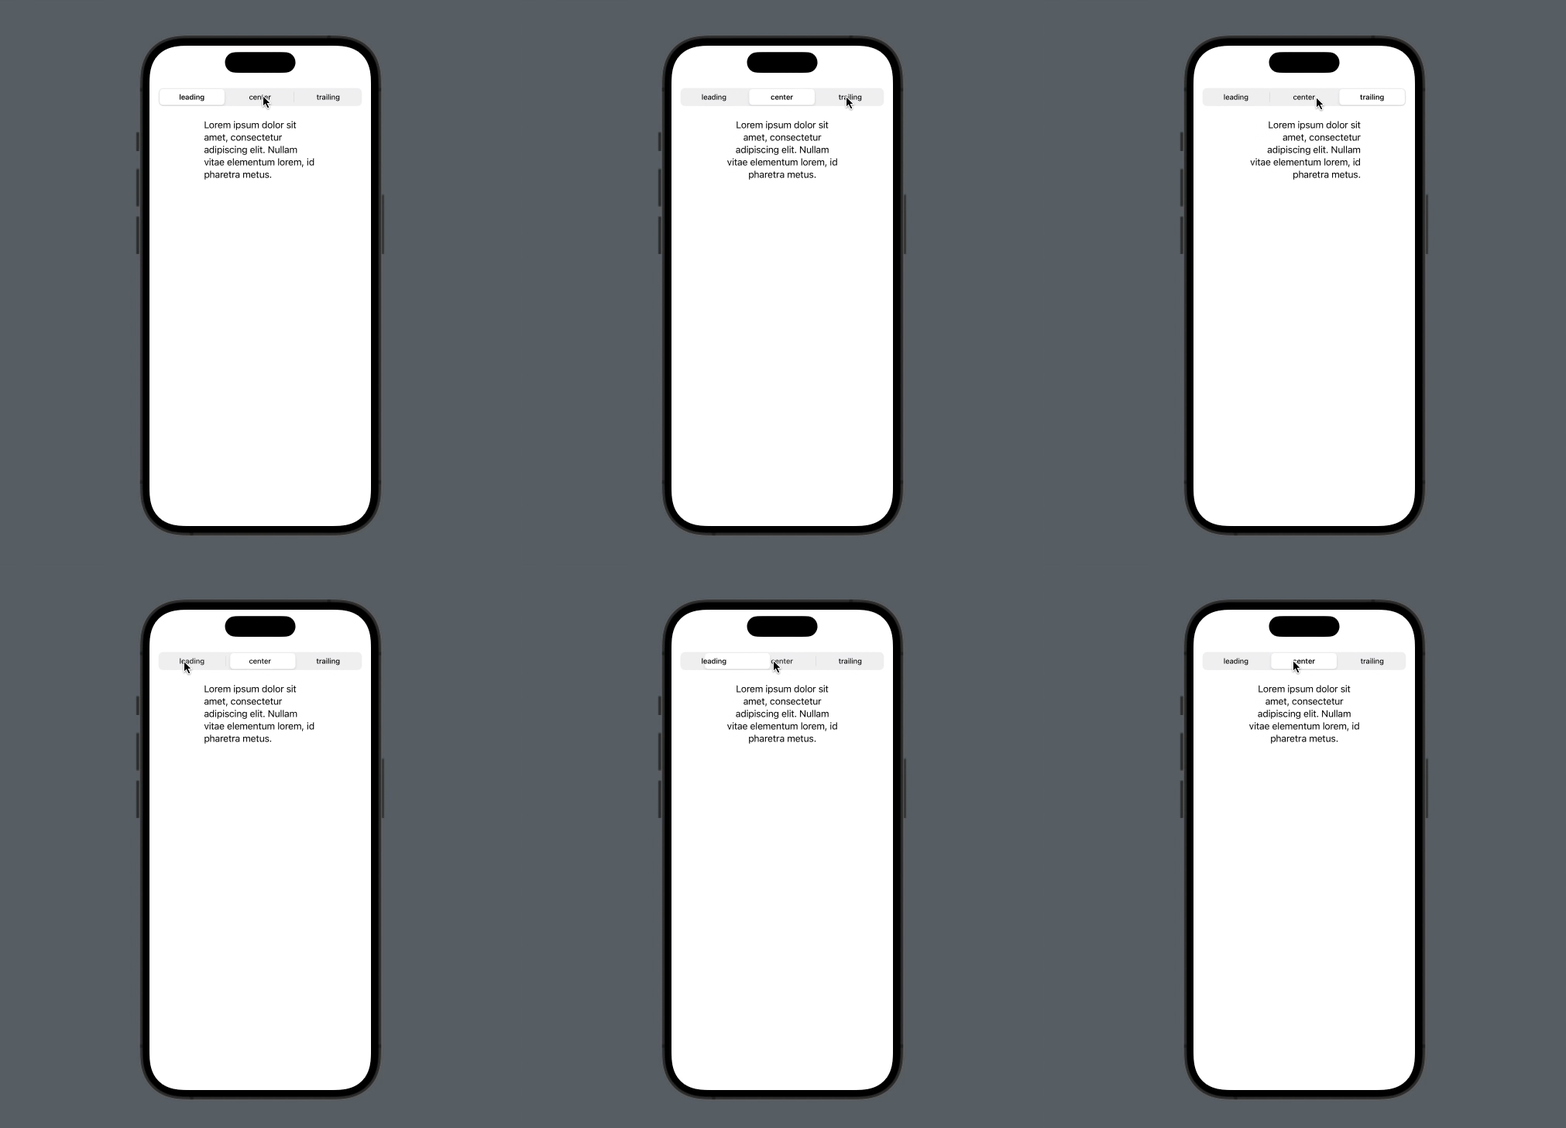
That's all for this tips and tricks. Give it a try, and hopefully, this little insight proves to be useful.

