Creating an Intuitive Custom Swipe Experience with SwiftUI
Learn how to utilize custom swipe buttons effectively in List rows with SwiftUI. Explore the power of swipe actions for mobile app design

In the world of mobile app development, providing a seamless and intuitive user experience is paramount. One highly recognized and beloved interaction pattern in iOS is the swipe gesture on list items. You've likely seen and used this countless times in Apple's native Mail app, where swiping left or right on an email reveals quick actions like "Archive," "Flag," or "Delete."
Before iOS 15, implementing this feature natively in SwiftUI was surprisingly difficult and often required dropping down to complex UIKit wrappers (like UITableView). However, one of the most exciting new features introduced in SwiftUI 3 (iOS 15) was the addition of the swipeActions() modifier for List rows. By using the swipeActions modifier, you can now effortlessly add buttons as left or right swipe actions directly within a pure SwiftUI List.
Understanding the swipeActions Modifier
Let's look at the basic signature of the swipeActions modifier to understand how it operates under the hood:
func swipeActions<T>(
    edge: HorizontalEdge = .trailing,
    allowsFullSwipe: Bool = true,
    content: () -> T
) -> some View where T : View
As shown in the description above, the modifier accepts a few highly customizable parameters:
edge: This parameter dictates the swipe direction. You can set it to reveal actions when swiping from the left (.leading) or from the right (.trailing). By default, if you don't specify this parameter, SwiftUI assumes you want a trailing swipe (swiping from right to left).allowsFullSwipe: This boolean parameter determines whether a "full swipe" action can be performed. If set totrue(the default), swiping the row all the way to the edge of the screen will automatically trigger the very first action button without the user needing to explicitly tap it. This is identical to swiping an email all the way to the left to delete it instantly.content: This is a ViewBuilder closure where you define the actual buttons (the actions) that will appear when the swipe occurs.
Implementing Multiple Swipe Actions
The beauty of swipeActions is that you aren't limited to just one button or one side. You can stack multiple buttons, and you can even chain multiple modifiers to provide actions on both the left and right sides of the row simultaneously.
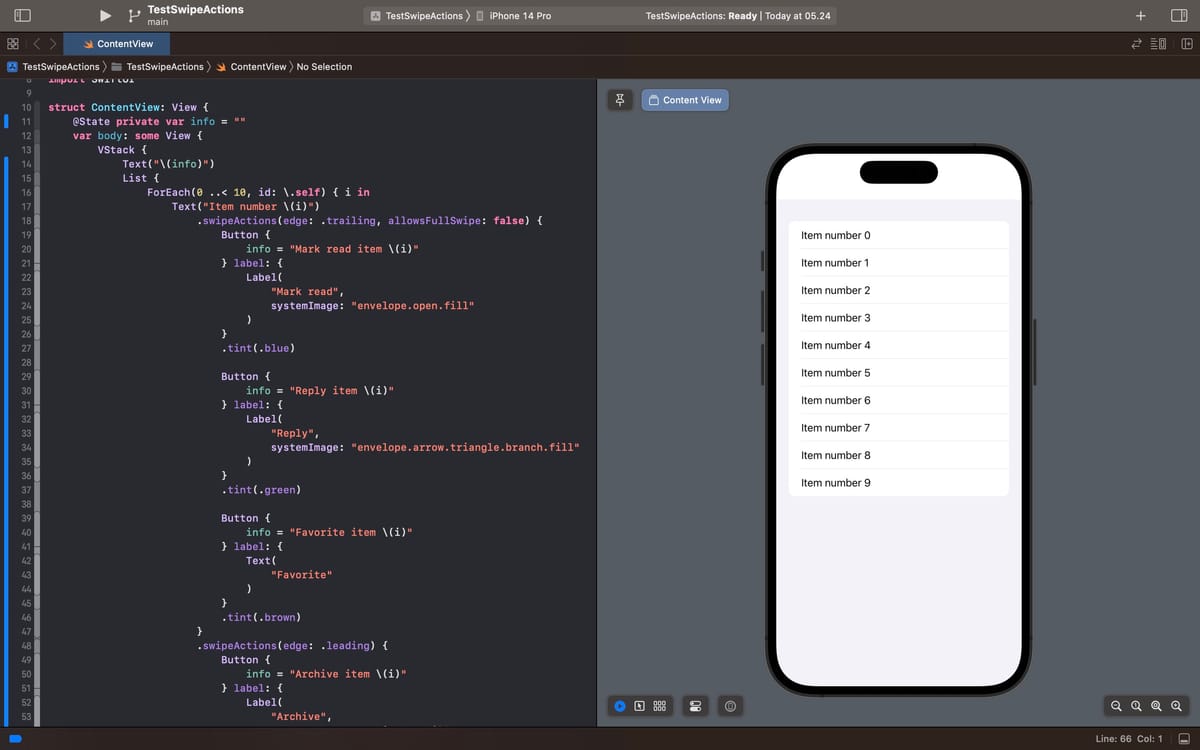
Here is a comprehensive example demonstrating how to use swipeActions with multiple buttons from both directions:
import SwiftUI

struct ContentView: View {
    @State private var info = ""

    var body: some View {
        VStack {
            Text("\(info)")
            List {
                ForEach(0 ..< 10, id: \.self) { i in
                    Text("Item number \(i)")
                        // 1. Trailing actions (Swipe Right to Left)
                        .swipeActions(edge: .trailing, allowsFullSwipe: false) {
                            Button {
                                info = "Mark read item \(i)"
                            } label: {
                                Label("Mark read", systemImage: "envelope.open.fill")
                            }
                            .tint(.blue)

                            Button {
                                info = "Reply item \(i)"
                            } label: {
                                Label("Reply", systemImage: "envelope.arrow.triangle.branch.fill")
                            }
                            .tint(.green)

                            Button {
                                info = "Favorite item \(i)"
                            } label: {
                                Text("Favorite")
                            }
                            .tint(.brown)
                        }
                        // 2. Leading actions (Swipe Left to Right)
                        .swipeActions(edge: .leading) {
                            Button {
                                info = "Archive item \(i)"
                            } label: {
                                Label("Archive", systemImage: "archivebox.fill")
                            }
                            .tint(.cyan)
                        }
                }
            }
        }
    }
}swipeActions demo app
Visual Customization: Text vs. Labels
In the example above, you might notice that we used standard Buttons but provided different types of views for their label closures. Some use Labels, and others use plain Text.
The difference lies entirely in their visual presentation within the swipe action menu. If you use a Label (which combines text and an SF Symbol image), only the icon will visually appear to save space, keeping the UI clean. However, if you use a standard Text view, the text itself will be rendered.
Button {
    info = "Favorite item \(i)"
} label: {
    Text("Favorite") // This renders the word "Favorite"
}
.tint(.brown)
Button {
info = "Archive item \(i)"
} label: {
// This renders ONLY the archive box icon visually in the swipe menu
Label("Archive", systemImage: "archivebox.fill")
}
.tint(.cyan)The Color Tinting
Don't forget the power of the .tint() modifier! By default, buttons might appear generic (often gray). By applying .tint(.red) for a delete action or .tint(.blue) for an edit action, you provide immediate visual context to the user regarding the button's intended function.
Conclusion
Implementing swipeActions drastically elevates the professionalism and "native feel" of your SwiftUI application. Feel free to try changing the value of allowsFullSwipe to true and false in your Xcode playground to feel the tangible difference it makes in the user experience.
That's all for this tip/trick. Happy experimenting, and hopefully, this detailed guide will be highly useful for your app's list interfaces.